
Welcome to the new Universal Accessibility webpage. This tool will help you browse through the site and find the information you need. It features news, métro station accessibility updates and tips on how to get around by bus and métro.
Universal Accessibility news
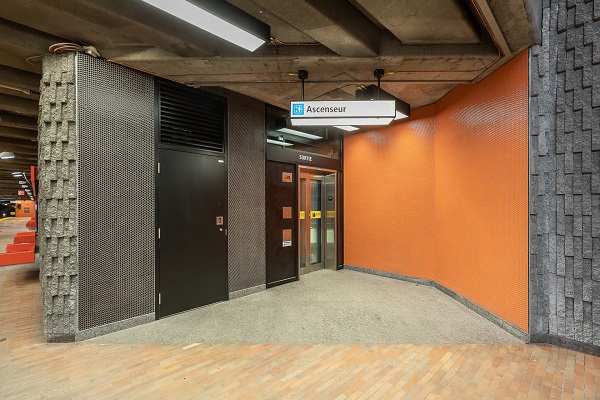
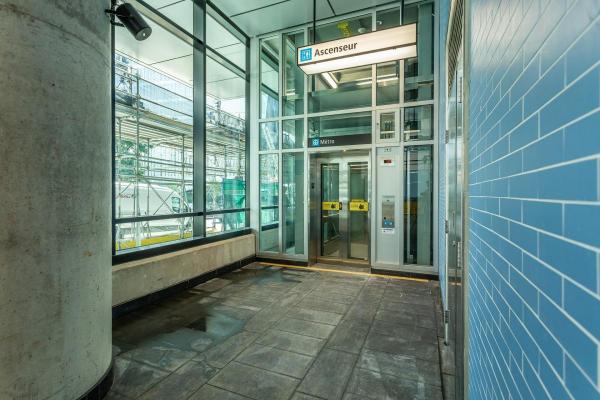
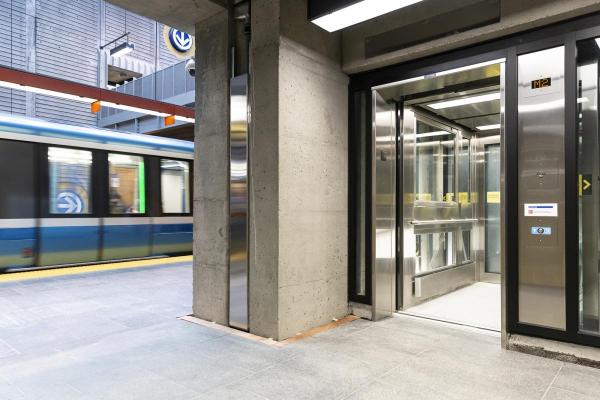
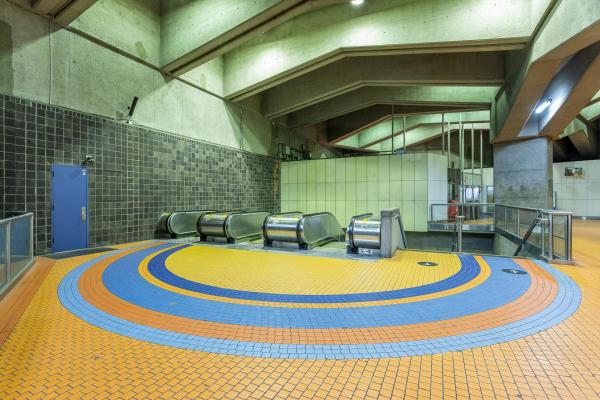
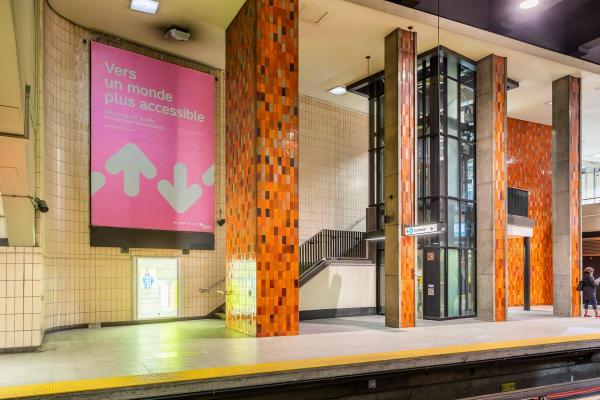
Edouard-Montpetit station becomes universally accessible
The Société de transport de Montréal (STM) has commissioned two new elevators at Édouard-Montpetit station.
It then becomes the 31st station with elevators in the metro network.
Companion cards to be replaced by OPUS
You will need to replace your companion card, the laminated card that entitles you to take a companion for free on public transit (bus, métro, train, REM and river shuttle) in the Greater Montréal area.
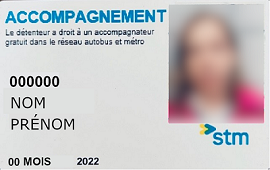
Your current card needs to be replaced by an OPUS card like this one above.
You must replace your companion card by March 31, 2024. After that date, your current companion card will no longer be accepted.
How to replace your companion card
At the top of this page:
- Click on the “Before leaving” tab
- Scroll down and click on “Companion card”
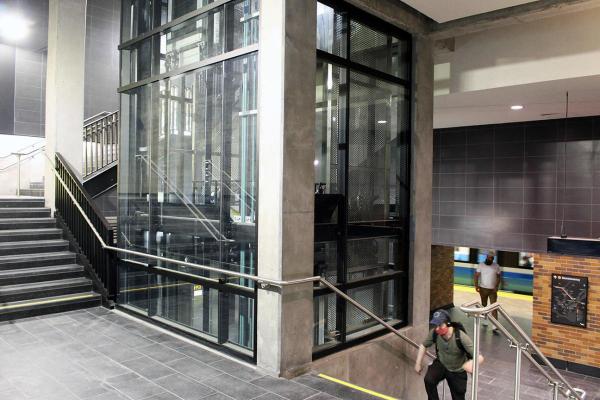
Société de transport de Montréal announces the commissioning of elevators at Outremont and Place-Saint-Henri stations, making them the 28th and 29th universally accessible stations in the metro network. The addition of elevators will benefit customers with functional limitations as well as families with young children, elderly people and those travelling with luggage.

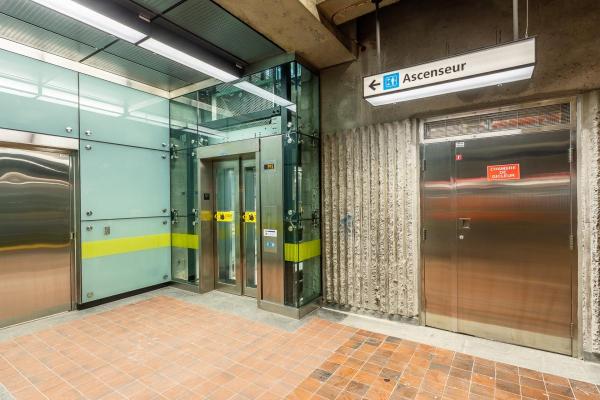
The Société de transport de Montréal (STM) has commissioned three new elevators at D’Iberville station, making it the 27th accessible station in the métro network. The addition of elevators will benefit customers with functional limitations as well as families with young children, elderly people and those travelling with luggage.
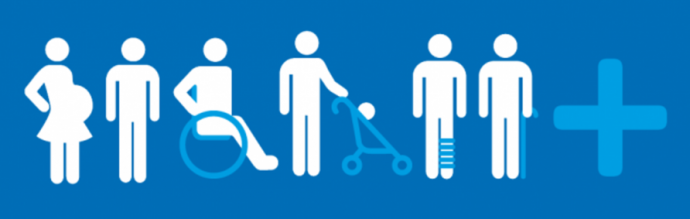
Everyone who takes the métro, rides the bus or uses paratransit is part of the public community. When we know each other better, we ride together better. Start getting to know your community with these three profiles (in French only).
People with permanent functional limitations who need to be accompanied when using the bus, métro, train and REM networks can obtain a companion card.
With this card, the person accompanying you can travel free of charge on these public transit networks if you present your valid transit fare.
For more information, click on the "Before leaving" section at the top of this page, then click on "Companion Card".
It's now possible to find out the status of escalators in our metro stations in real time.
The rollout of this feature coincides with National Accessibility Week, which runs from May 28 to June 3, 2023, as well as Quebec Disabled Persons Week, which takes place from June 1 to 7, 2023.
 : Escalator in service;
 : Up escalator in service;
 : Down escalator in service;
 : Escalator in service, unknown direction;
 : Escalator condition to check;
 : Up escalator condition to check;
 : Down escalator condition to check;
 : Escalator out of service.
McGill station becomes 26th accessible station in the métro network
The Société de transport de Montréal (STM) is announcing today the commissioning of a new elevator at McGill station, allowing access to the Angrignon platform from the street. By combining this elevator with the one connecting the mezzanine to the Honoré-Beaugrand platform, which was commissioned last fall, the station officially becomes the 26th station in the métro network to be universally accessible.

The Société de transport de Montréal (STM) is announcing that two new elevators are now in service at Jolicoeur métro station, bringing the number of universally accessible stations to 25.
On October 15, 2022, we are launching a pilot project allowing dogs in the métro under certain conditions. Dogs will not be allowed on buses or paratransit vehicles.
Guide and assistance dogs will continue to be allowed on the entire network, i.e. on buses, métro and paratransit at all times.
It is possible that an STM employee will approach you regarding the instructions for pet dogs. In such a case, we invite you to inform them that your dog has the status of a guide or assistance dog. If you have a certificate, we suggest that you bring it with you when you travel in the system, as this will greatly help our employees in their work.
A new version of the trip planner is now available on our website and mobile site. It is now possible to search for routes that are accessible to wheelchair users.
Only buses equipped with a front ramp, accessible stops and métro stations with an elevator are reflected in the planning of our accessible routes. Trips are calculated according to the planned schedule and routes.
Caution :
We cannot guarantee the accessibility of portions involving the road network (sidewalk, pedestrian bridges, tunnel, etc.). Please let us know if you notice that any part of the suggested route is permanently inaccessible.
- From the home page, click on the Your trip tab.
- Enter your Origin address.
- Enter your Destination Address.
- Select Leave to search an itinerary with a desired departure time or
- Select Arrive to search an itinerary with a desired arrival time.
- Select the date of your trip.
- Select the time, hour and minutes of your trip.
- Click on Show Options.
- Check your desired modes of transportation.
- Check the Wheelchair Accessible box.
- Click on the Get itinerary button.
Several routes will be suggested to you, select the route that best suits your needs. View the detailed itinerary for each step of your trip
New video:
For the Semaine québécoise des personnes handicapées, we met Anne-Marie, Bedashly and Catheryne, who shared with us what it’s like to use public transit when you have a functional limitation.
Watch them take a trip and see some of the obstacles and challenges they face when using our network, which, while imperfect at times, still includes many initiatives to improve accessibility with your help and that of our staff.
Watch the video Travelling by public transit with a functional limitation. (French only
The work for the integration of elevators at Place-des-Arts station is completed, and the three new elevators are now in service. Place-des-Arts station thus becomes the 21st universally accessible station in the metro network. This work began in 2019, as a real estate project by a private developer was planning to integrate the De Bleury North kiosk into its new building.
Work on the project began in 2018 and involved expanding the entrance building to install two elevators, making Mont-Royal the 20th accessible station in the métro network. Two staircases were also added, connecting the platforms to street level, as well as a pedestrian tunnel running over the tracks between the two platforms. These changes will make it easier for customers to move within the station.
On November 30th, the Société de transport de Montréal (STM) will commission the new elevators at Viau station, making it the 19th station in the métro network to be made accessible, in an area with great potential as a tourist destination due to the nearby Olympic Park and Space for Life facilities.
On November 8, the STM will commission the three new elevators at Préfontaine station, on the Green line, making it the 18th station in the métro network to be part of the Universal Accessibility project.
The work began in September 2019 and required several stages to integrate the elevators, most notably the construction of a new entrance building. Other stages included building a mezzanine extension over the platforms and building and setting up new mechanical rooms.
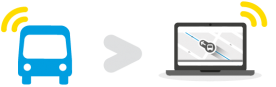
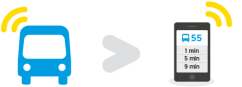
Desktop and mobile websites can now display information on departures of buses with two wheelchair spaces for customers. In 2018, the STM began purchasing buses with two spaces for wheelchair users. These buses now comprise 27.5% of the STM fleet.
Schedules for buses with a front ramp can also be viewed on desktop and mobile websites, as well as via other means of communication, including text message, iPhone and Android apps and passenger information terminals.
The symbol will be displayed next to the icons of the geolocated buses on the website’s map, and near the transit times in the list of upcoming departures. ![]()


Universal access
The purpose of this section
It provides you with all the information you need to travel within our networks.
Who this section is for
It benefits all customers, especially those with functional limitations who want information on how to get around by bus and métro.
Mobility aids
- The network is accessible to most customers using manual and motorized wheelchairs and three- and four-wheel scooters.
Restrictions
- Maximum length of 117 cm (46 inches).
- Maximum width of 66 cm (26 inches).
- Wheelchairs equipped with large rear seat bags are not recommended.
Guide dogs and service dogs
- All customers are entitled to accompaniment by a guide dog or service dog required for a disability.
Planning your transit ride
- Find out more about the 68 stations, 4 métro lines and 228 bus lines (local network, 10 minutes max, all-night bus service, express, etc.): Network overview
- Check out métro and bus line maps: Network maps
- See the list of stations with elevators: Elevator access to the métro
- Learn more about real-time schedules: iBUS : your bus schedule in real time
- Check if your trip has been affected by construction before you leave to avoid unwelcome delays.
- Is there a service slowdown or disruption?


- Website:View a planned or real-time itinerary or schedule.
- From the home page, click on the Your trip tab.
- Enter your Origin address.
- Enter your Destination Address.
- Select Leave to search with a desired departure time or
- or Arrive to search with a desired arrival time.
- Select the date of your trip.
- Select the time, hour and minutes of your trip.
- Click on Show Options.
- Check your desired modes of transportation.
- Check the Wheelchair Accessible box.
- Click on the Get itinerary button.
- Several routes will be suggested to you, select the route that best suits your needs.
- View the detailed itinerary for each step of your trip.
- In order to facilitate your travels, the status of an out-of-service elevator is reflected in real time.
- On the home page, click on the Schedules and Maps tab or click on the Getting Around heading, and then on the Schedules and Maps tab.
- Type in or select your bus line and its direction.
- Type in or select the name of your stop
- Important: Check the “Display only arrival times of buses with front ramp” box.
- Click on the “search” button (right next to the checked box).
- Mobile site: Plan a trip using a bus geolocation feature.
- From the home page, click on the Your trip tab.
- Enter your Origin address.
- Enter your Destination Address.
- Click on Options.
- Select Departure to search with a desired departure time or
- or Arrival to search with a desired arrival time.
- Select the date of your trip.
- Select the time, hour and minutes of your trip.
- Check the Wheelchair Accessible box.
- Check your desired modes of transportation.
- Click on Back.
- Several routes will be suggested to you, select the route that best suits your needs.
- View the detailed itinerary for each step of your trip.
- In order to facilitate your travels, the status of an out-of-service elevator is reflected in real time.
Under the Menu tab in the bottom right-hand corner of the screen, select “Show departure times for buses with front ramps only.” Now your search results will show departure times for buses with front ramps only.
- Transit and Chrono (partner mobile apps): View information with your cell phone during your trip.
Schedules for buses with a ramp at the front are identified by the wheelchair pictogram on Transit and Chrono apps, our partners. These apps are accessible without an internet connection. No need to be connected to review bus schedules.
For more information about these apps, visit the Mobile apps gallery.
- Automated telephone line: For upcoming bus departures at specific stops, 514 288-6287.
- Call 514 288-6287 (514 AUTOBUS).
- Choose option 1 – Bus schedules
- Choose option 3 – Low-floor bus schedules
- Choose option 1 for specific wheelchair-accessible bus service
You will need to enter your bus stop’s five-digit code and bus line number. You can see that code on the bus panel at your stop or by finding it under Schedules from the home page.
- Customer service: For all questions or help planning your trips, call 514 786-4636 + extension 4.
- Open the Google Maps webpage: https://www.google.com/maps/.
- Click on the “Directions” button.
- Select the public transit icon.
- In the first field, enter a starting point.
- In the second field, choose a destination.
- In the drop-down menu, select “Leave now,” “Depart at” or “Arrive by.”
- Select the desired date and time.
- Click on “Options.”
- Set your preferences by checking the appropriate boxes, either “Bus” and/or “Subway”.
- Click on the “Wheelchair accessible” button under the Routes section.
- Select your preferred itinerary from the list.
- You can view more routes by clicking on “Schedule explorer.”
- Open the Chrono app.
- Click on the “Bus” tab.
- Select “Société de transport de Montréal.”
- Choose a bus line.
- Input a destination.
- Choose a stop in the list.
- Make sure that the schedule has a wheelchair symbol.
In winter, accessible service is offered at accessible bus stops. However, under conditions of heavy snowfall or freezing rain, safely extending the ramp at accessible bus stops may prove too difficult.
Get all the information before leaving
When weather conditions are changing rapidly, messages to wheelchair users are displayed in a blue banner on our website.
When heavy accumulations are expected
The following message is displayed in a blue banner on our website's home page:
Wheelchair users, please note: due to weather forecasts, providing service at accessible bus stops may prove difficult.
This message means that offering service at accessible bus stops may not be possible over the next few hours, depending on how weather conditions evolve. Please pay attention to this when planning your return trip.
When it is still snowing heavily
The following message is displayed in a blue banner on our website's home page:
Wheelchair users, please note: due to current weather conditions, extending the ramp at accessbile bus stops may be impossible.
This message means that because of heavy accumulations, it may be impossible to safely extend the ramp for passengers boarding or exiting at certain accessible bus stops. If that was the case at your destination stop, the driver may have no choice but to let you off at another stop.
During a major snowstorm
The following message is displayed in a blue banner on our website's home page:
Wheelchair users, please note: due to the snowstorm, we suggest that you postpone your plans and travel another time.
This message means that we are seeing very difficult road conditions across the city. As a result, it may be impossible to extend the ramp for boarding or exiting passengers at several accessible bus stops.
Purchasing a transit fare
Need a transit fare?

We have the right fare for you.
Reload your OPUS card on the Chrono app
You can use the Chrono mobile app to buy transit fares and load them directly onto your card.
Learn more on how to reload your OPUS card via the app
We’re here to answer all your questions
Services offered in métro stations.
Buy your transit fares, anywhere!
List of authorized retailers:Find the nearest authorized retailers and their accessibility rating in the list below..
OPUS Card
- Register your OPUS card: Protect your card against loss and theft. You will be able to replace it and recover the valid transit fares that were on your card when you reported it missing.
- OPUS à l’année:Annual subscription program for the STM bus and métro network in the Montréal region. It is available for regular monthly fares and reduced fare passes for 65 years and over.
- To pay the reduced fare, you need to load fares on your registered photo ID OPUS card.
- Students:Get your student photo ID OPUS card.
- 65 years and over:Get your photo ID OPUS card.
People with permanent functional limitations who need to be accompanied when using the bus, métro, train and REM networks can obtain a companion card.
With this card, the person accompanying you can travel free of charge on these public transit networks if you present your valid transit fare.
Validity
- Companion card holders must validate their fare with the bus driver or métro station agent.
- Companion card holders must present their companion card to the bus driver or station agent for their travel companion to travel free of charge.
- Companion card holders must ensure that their transit fare is valid.
NOTE : A photo OPUS card issued by Transport adapté can be used as a companion card on the métro, bus, train and REM networks.
Obligations
The holder of an STM companion card is required to:
- Show the companion card when paying their fare
- Inform STM of any change of address
- Inform STM as quickly as possible if their card is damaged, lost, or stolen
- Not allow card use by anyone else
- Immediately return card to STM if it is not being used
How to replace your companion card with OPUS :
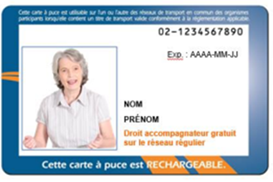
Companion cards are now issued as photo OPUS cards instead of laminated cards like this one.
Old companion card.
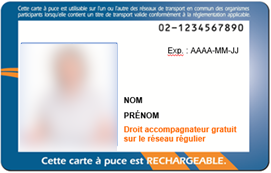
This is a new companion card on OPUS
Deadline
You must replace your companion card by March 31, 2024. After that date, your current companion card will no longer be accepted.
1- Go to one of the following authorized service points:
Any métro station
STM Fairview Pointe-Claire terminus
2- Show the employee at the counter:
The letter you received in the mail telling you to replace your card
Your laminated companion card or an ID
3- Pay the OPUS card issuance fee
How to get your new companion card for the first time
Download this form.
Costs
Your new OPUS card will be issued for $6.00 or $15.00 depending on your fare profile:
Children ages 11 and under
OPUS card cost: $6. OPUS card validity period: until the child turns 12
Students ages 12 to 14
OPUS card cost: $15. OPUS card validity period: 2 years
Students ages 15 to 17
OPUS card cost: $15. OPUS card validity period: 1 year
Students ages 18 and over
OPUS card cost: $15. OPUS card validity period: 1 year
Non-student adults
OPUS card cost: $6. OPUS card validity period: 4 years
Seniors ages 65 and over
OPUS card cost: $15. OPUS card validity period: 7 years
Travel companions travel free of charge if a companion card is presented.
Companion card holders must pay for their trip.
For more information about the companion card
Contact our Customer service at 514 786-4636 (STM-INFO)
Frequently asked questions
Yes. Unless you qualify for paratransit services or already have a companion card issued by a transit agency in the Greater Montréal area, you must fill out the application form for an OPUS card entitling you to have a companion ride with you for free on the regular public transit network..
For the time being, you do not need to replace your card. You can continue to use it on the regular networks of the transit agencies under the same conditions. Your transit agency will contact you when the time comes to replace your current companion card.
No. These rules remain the same.
Yes. The Autorité régionale de transport métropolitain (ARTM) by-law prescribing conditions regarding the possession and use of transit fares for public transit services in the metropolitan area (CQLR, c. A-33.3, r.3 (2022)) stipulates that the travel companion of a person with a disability is exempt from validating a fare on the regular network if the person with a disability presents their paratransit card issued by a transit agency (or OPUS card, which serves as proof of eligibility).
However, the paratransit card is not a transit fare. The paratransit card holder must also have a valid transit fare when traveling.
If you do not qualify for the paratransit service provided by your transit agency, you can apply for an OPUS card entitling you to have a companion ride with you for free on the regular network, provided that you:
- Reside in ARTM territory (zones A, B and C) or in a municipality not covered by the ARTM that has signed an agreement with the ARTM to provide public transit services to its population (zone D)
- Have one or more of the following severe and permanent disabilities:
- Hearing disability
- Cognitive or physical disability
- Severe learning disability
- Intellectual disability or ASD
- Motor or organic impairment
- Language or speech disorder
- Vision or seeing disability
- Experience difficulties with one or more of the following aspects of travel that justify the need for a companion when traveling on the regular network:
- Getting around on your own
- Orienting yourself in space and time
- Understanding or making yourself understood through verbal communication or gestures
- Keeping yourself safe
- Controlling behaviour that may be detrimental to your safety or the safety of other users
The OPUS card entitling the holder to be accompanied by someone for free on the regular network can be issued to anyone age 6 or over who meets the eligibility criteria. A travel companion must be at least 14 years old.
No. The completed form is sufficient. Once your eligibility has been confirmed, your transit agency will contact you with instructions on how to obtain your OPUS card entitling you to have a companion ride with you for free on the regular network.
The following health professionals are authorized to certify that you need to be accompanied:
Audiologists
Special education teachers and technicians
Occupational therapists
Respiratory therapists
General practitioners
Medical specialists
Neuropsychologists
Optometrists
Speech therapists
Physiotherapists and physiotherapy technologists
Psychoeducators
Psychologists
Orientation, mobility and vision loss rehabilitation specialists
Social workers and social services workers
In addition to valid ID (health insurance card, driver’s licence, passport, asylum seeker document or birth certificate), you will need to provide the agent at the service point with written confirmation from your transit agency that you are eligible for the OPUS card entitling you to have a companion ride with you for free on the regular network.
Your photograph will be taken on site and printed on your new OPUS card to confirm that you are entitled to have a companion ride with you for free on the regular network. The card will also contain a note confirming this.
No. You do not have to buy a transit fare at the same time. However, you must make sure that you have a valid transit fare on hand when you travel.
- RTL: metropolitan ticket office at the Longueuil terminus
- STL: metropolitan ticket offices at the Cartier and Montmorency terminuses
- STM: any métro station and the Fairview service point
- exo: metropolitan ticket offices and exo service point
.
No. You can only obtain your OPUS card at one of the service points designated by your transit agency and indicated in the official notice about this.
Yes, the new OPUS card is valid on board the regular services of exo, RTL, STL, REM and STM.
Your new OPUS card has two purposes: It confirms that you are entitled to have a companion ride with you for free on the regular network (identification purpose), and it allows you to purchase fares for your trips (fare-holder purpose).
No, due to technical limitations. Your OPUS card will be able to hold the following fares:
- All All Modes A fares
- All bus fares
- All Modes AB, ABC and ABCD and Out-of-Territory Bus monthly passes
- Unlimited Evening and Unlimited Weekend fares
- Old single or multiple transit fares that still exist in the new ARTM fare schedule (TRAM, TRAIN)
Go to a metropolitan ticket office, STM service point or exo sales and service outlet. Be sure to bring valid ID. Your lost, stolen or damaged OPUS card will be deactivated and replaced with a new photo OPUS card. Your remaining fares will be transferred to the new card. A fee will be charged for issuing your new OPUS card.
Yes, you do. Whenever you travel, you must:
- Validate your fare for your trip(s)
- Show your OPUS card when validating your fare and whenever requested to do so by a constable to justify the fare exemption for your travel companion
- Inform your transit agency of any change of address or if your OPUS card is lost, stolen or damaged
- Return your OPUS card to your transit agency if it is not being used
Note that only one person is allowed to travel with you for free. This person must be at your side throughout your trip.
You and your travel companion will each have to validate a fare if you do not have your OPUS card with you at the time of travel.
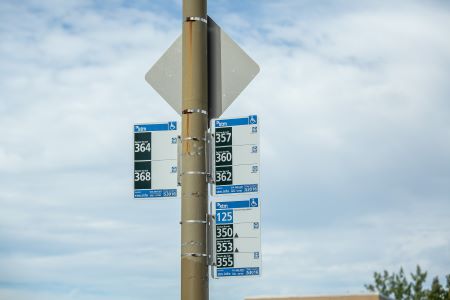
Waiting for the bus
Bus stop signs
- Bus stop signs provide valuable information for your trips:
- Bus line number
- Direction
- Accessibility (wheelchair symbol)
- Stop code
Infobus signs
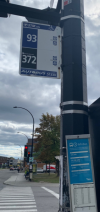

Infobus signs show the planned schedules of buses at the stop.
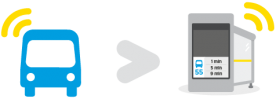
Information terminals
The information terminals display the next arrival of buses in real time.
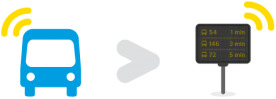
Digital bus shelters
Digital bus shelters include screens that display real-time schedules (in minutes) or planned schedules (in time of day).
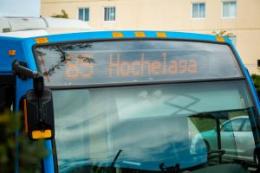
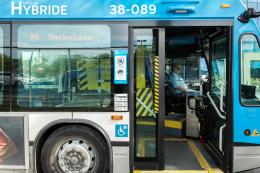
Information on the bus
- The bus line number is indicated at the top.
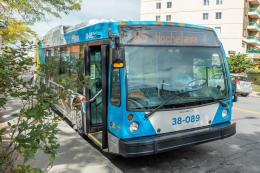
- A wheelchair symbol is displayed near the door with the ramp.
- If the bus has two spaces for wheelchairs, the icon will be placed near the front door:

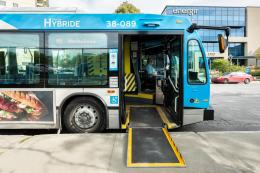
Getting on and off the bus
When getting on the bus
- You can ask the driver to lower the front of the bus to meet the curb.
- People with strollers, walkers, canes or wheelchairs have priority when boarding the bus.
On the bus
- Choose buses with a front ramp for easier access.
- When boarding, it is important to tell the driver where you’ll be getting off.

The driver’s role
- The bus driver is responsible for passenger safety and must ensure that proper conduct is maintained on the bus.
- The driver can help you validate your fare and provide information on your trip.
- The driver is not supposed to leave the driver’s seat.

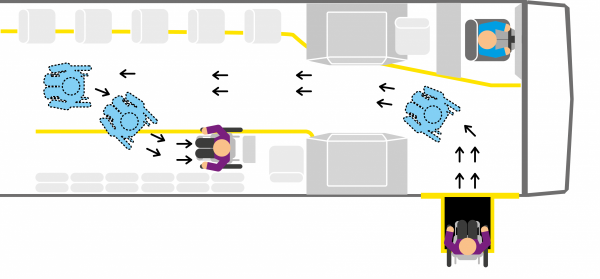
Getting on a bus with a ramp
- Be at the front of the line: you board the bus first.
- Let customers exit the bus before boarding.
- Wait until the ramp is fully extended before boarding the bus.
- Tell the driver where you’ll be getting off.
- Inform the driver to wait until you are settled in the designated area before departing.
- Apply the brakes of the manual wheelchair or switch off the motorized wheelchair.
Were you unable to get on the bus?
- The driver will inform you that he will notify the bus control room via his radio console as he returns to service. He cannot stay on site as he must continue his service to serve other customers;
- Rest assured that as soon as a call is placed by a driver to the bus control room, support is organized to assist you. It's important that you stay put;
- If you have not received any information from the driver, call STM customer service at 514 786-4636 + 6 to report your situation and a pick-up will be arranged. It's important to note the date, time and bus number.
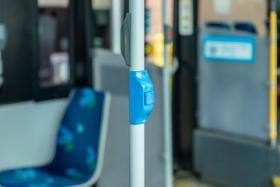
Requesting a stop and the ramp
Press one of the blue buttons in the designated wheelchair area.
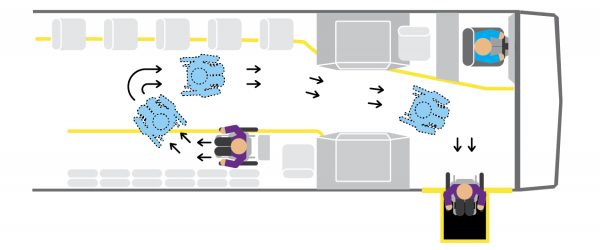
Getting off a bus with a ramp
- Let the other customers exit the bus.
- Wait until the bus has come to a complete stop before making your way to the front.
- Wait until the ramp is fully extended to the curb before getting off the bus.
How to use the Between Stops service
Let the driver know where you would like to get off, and they will determine if it is safe to stop.
The following conditions must be met to safely exit the bus: access to a sidewalk; enough room for the driver to parallel park and sufficient space to fully extend the ramp on the sidewalk.
Validating your transit fare on the bus
Tap your OPUS card on the reader or insert your paper fare or exact change in the designated slot.
The types of card readers on buses
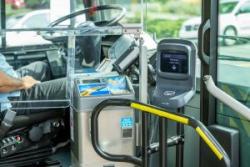
Tap your OPUS card on the reader or insert your paper fare or exact change in the designated slot.
Forms of payment
- OPUS card loaded with fares prior to the trip.
- Magnetic fare card.
- Cash (only in the fare box, at the front of each bus).
Lexicon of terminology:
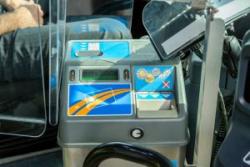
New card reader: A new type of transit fare validation device installed in buses. When these card readers detect a chip card, they confirm whether or not the card is loaded with a valid transit fare.
Fare box: Fare boxes are the old fare validation devices that were used before the new card readers for the payment or validation of fares on buses. The cash payment and magnetic card reading parts still work. The parts used to read OPUS cards have been deactivated, as the tap targets on the new card readers will now be used for this type of fare.
Transit fare: Transit fares are tickets or passes that show that a customer has paid to use public transit. There are several devices that can be loaded with a transit fare: reloadable OPUS cards, non-refillable smart cards and magnetic fare cards. Transit fares can be purchased in advance from authorized retailers, fare vending machines or station agents at métro station fare booths.
OPUS card: OPUS cards are reloadable and can hold multiple different transit fares. They are plastic chip cards the size of credit cards but without any embossed text on their surfaces. On buses, customers must use the new card readers to validate fares on OPUS cards.
Non-refillable smart card: Some transit fares are available on these non-reloadable glossy paper cards. These cards do not have an identifying notch on their edge. They can be distinguished from OPUS cards because they are made of paper rather than plastic.
Magnetic fare card: Some transit fares are available on non-reloadable magnetic strip cards. These cards can be identified either by a small notch on their edge or by a cut off corner.
Project overview:
The integrated chip card reading function of bus fare boxes is being replaced with a better-performing external model. As such, new card readers have been added to buses to validate fares on chip cards. These card readers are located at the front door of all buses and at the back door of articulated buses. When boarding a bus at the back door, you must use the new card reader to validate your fare.
At first, only smart cards (OPUS and non-refillable smart cards) will be accepted. Later, the new equipment will also allow us to upgrade to new technologies.
Differences between new card readers and fare boxes:
The new contactless card readers cannot read fares on magnetic strip cards or accept cash payment.
Customers paying in cash or using a magnetic fare card will have to enter at the front door and use the fare box that was already there. Fare boxes will still be used for these types of payment. The magnetic card reader on the fare box has a slot for inserting your magnetic fare card. Your card will pop back out of that slot once read. If you pay in cash, your ticket will pop out of this slot. Keep your fare card or ticket on you during your whole trip, as you will need it to transfer and as proof of payment.
The smart card readers on fare boxes will be deactivated, so there is no risk of accidentally validating your fare at the wrong card reader.
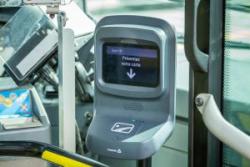
Physical description of the new card readers:
The new card reader will be about the size of a person’s head. The plastic casing has very round edges. It is L-shaped, like a small open laptop. There is a touch screen on the vertical surface and a tap target on the horizontal surface, where the keyboard would be. The tap target surface is located directly underneath the screen and slightly angled downward. It juts out forward and is about the size of a hand. The target covers the entire surface and has no tactile markings other than the shape.
The touch screen is located on the vertical surface and is about the size of a smart phone (120 millimetres by 75 millimetres, or 4 ½ inches by 3 inches) in landscape orientation. It can be located by touch by the shape of its frame. The whole device is attached at the back of its casing to a cylindrical vertical post.
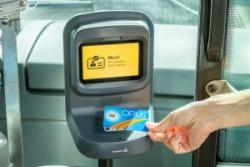
Using the card readers:
The target is contactless-enabled, so you do not have to touch your card to it. Be careful not to accidentally tap your smart card by bringing it too close to the target while you are finding the touch screen to hear an audio message.
Once a chip card has been read, the acceptance status is displayed on the screen and a beep is played. The beep will be different depending on whether the transit fare is accepted or not. A short beep means that your fare has been validated, while a long beep means it has been rejected. For photo OPUS cards, the short beep will play twice in a row when the fare is accepted.
The acceptance status message displayed on the screen can be read aloud using the audio function.
Card reader audio function description:
- When you tap your card on or near the target to validate your fare, you will hear a beep indicating whether the transit fare is accepted or not. After the beep plays, you have a few seconds to activate the audio function and hear the message displayed on the screen. Caution: if the card reader detects a new fare validation before those few seconds are up, the new fare validation message will be played.
- You do not need to hear this message, as the beep already confirms whether the fare has been accepted or rejected. However, hearing the message may provide additional information, such as the number of fares remaining on your OPUS card, if you are using individual fares.
- To hear the message displayed on screen, you have to press on the touch screen. The edge of the screen can be found easily by touch. Simply find the outline of the screen. There are two areas you can press to activate different audio functions, one in the bottom-left corner and one in the top-left corner of the screen.
- Pressing the top-left corner will play the bus line number, for example, line 139.
- Pressing the bottom-left corner will play the message displayed on screen that details the acceptance status of your transit fare.
What to do if there is a malfunction or a free-entry day:
- On free-entry days, if you try to validate your transit fare, it will not be deducted from your smart card, and you will not hear a beep after tapping.
- If you do not hear a beep, this means that no transit fare was deducted from your smart card. This may be because it is a free-entry day or because there is a malfunction in the fare validation system. Press on the bottom-left corner of the screen to hear the message. If no message plays, please ask the driver.
Where the card readers are located:
The new card readers have been installed at the front door of all buses and at the back door of articulated buses. Two-door buses only have a card reader at the front door. All card readers are located to your right as you enter the bus. The only exception is the minibuses on line 212 (for a detailed description, see the corresponding section).
Card reader location at the back door:
- The card reader at the back door is located about 1,200 millimetres (47 inches) up from the floor and juts out from the vertical grab bar just after the glass barrier, roughly 1 metre in from the door. When you get on the bus, follow the glass barrier to your right or the handrail above it to the vertical post where the card reader is mounted. The card reader is positioned at a diagonal angle with the front facing toward you. In some cases, the card reader may be mounted on a crescent-shaped post attached to the vertical grab bar.
- If you are using a magnetic fare card or paying in cash, you will have to enter at the front door and use the fare box.
Card reader location at the front door:
- In both articulated and non-articulated buses, the front-door card reader is to your right as you get on the bus. When you get on, follow the handrail to your right. The handrail continues up toward the driver’s seat for about 1 metre.
- The fare box, where you can pay in cash or use a magnetic fare card, is either at the end of the handrail or behind it. The handrail may be angled about 45 degrees to your left.
- The card reader’s location varies slightly depending on the bus model, but it is located somewhere between the front door and the fare box, 50 millimetres (2 inches) behind the horizontal handrail. The base of the card reader, where the tap target is located, is level with the horizontal handrail.
Exception: minibuses (line 212):
Line 212 is served by high-floor minibuses. These minibuses are all equipped with new card readers at the front door.
Minibuses are only boarded at the front door. If you need to go up steps when you get on the bus, then it is a minibus. In this type of bus only, the card reader is exceptionally located to your left, level with the steps as you get on the bus. As you are coming up the stairs to board, follow the vertical handrail to your left. At the spot where it turns and runs horizontal, the card reader is located just above it.
The fare box is located slightly below the card reader.
What do I do if the bus ramp cannot be deployed?
If you are unable to board the bus, inform the driver whether you wish to remain at the stop to be assisted or if you will continue your trip independently.
The driver will communicate with the operations centre to report the situation. Depending on the circumstances and location, an appropriate solution will be arranged.
Aboard the bus
Asking the driver for assistance
- Freeing up reserved seats.
- Notifying the driver of your stop in advance.
- Asking for directions if there is a detour.
- Giving up reserved seats.
- Clearing the aisle to access the reserved area and seating.
- Observing your surroundings.
- Taking note of areas with blue, yellow and red signs.
Guide dogs and service dogs
- All customers are entitled to accompaniment by a guide dog or service dog required for a disability.
Requesting a stop by pressing the blue button
Transfers within the network
Transfers:All transit fares allow you to transfer between bus lines and the métro without having to pay a second time.
- Keep your validated fare during the entire trip, as inspectors may ask to check it.
- Validated fares are good for two hours.
- You cannot make round-trips or resume your trips once you have left the bus or métro station, even when returning to the same bus or métro route.
Inside the métro station
Directions outside the station
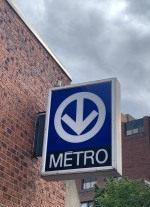
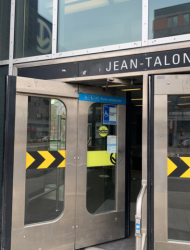
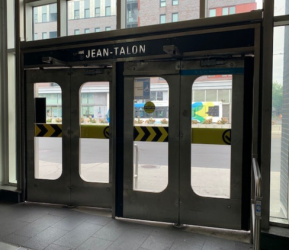
- Blue exterior sign (illuminated sign): Shows where to access entrance building.
- Black banner on the entrance building: Displays the name of the station.
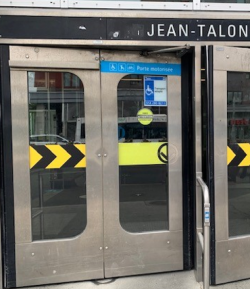
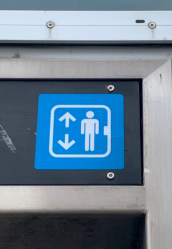
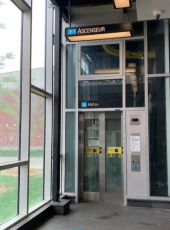
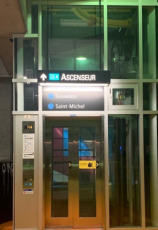
- Accessible entrance buildings: Identified by the elevator symbols.
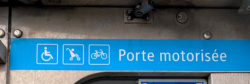
- Automatic butterfly doors: Identified by accessibility symbols and a "motorized door" sign. Press the blue button to open the doors.
Directions inside the station
- Levels in a station
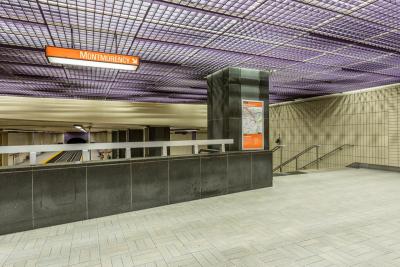
- Elevators
- Signage in stations
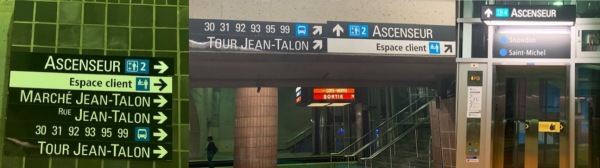
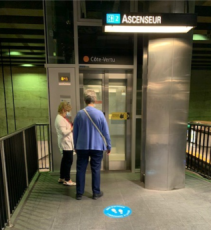
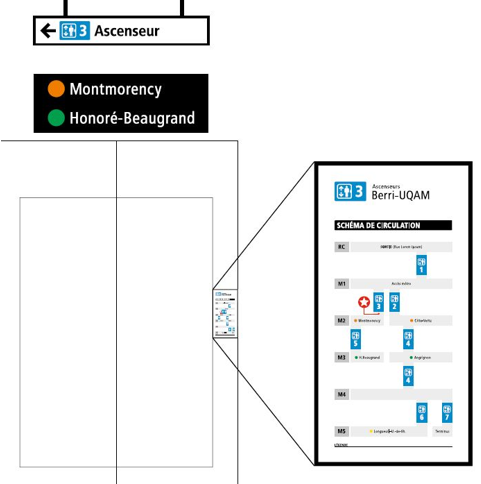
In stations with the new signage, the elevators are numbered.
In stations with multiple levels accessible by elevator, such as Berri-UQAM or Jean-Talon, there are vertical maps of the elevators to help you visualize the route through the station’s different levels.
When planning your route, it’s a good idea to write down or memorize the order in which you must take the elevators to get to the right platform.
NaviLens rollout pilot project
At stations
 Bonaventure and Mont-Royal
For 6 months, starting March 23
This technology, designed primarily for people with visual impairments, provides access to information to help you navigate inside a station.
The system will also benefit all customers, as it offers augmented reality navigation in some 40 languages.
Smart markers like this one are installed at various locations throughout the station.

With the NaviLens app, people can use their smartphones to easily detect these smart markers from a distance in any lighting conditions.
For people with visual impairments
- The marker recognition algorithm is paired with a system of sounds used to notify users of the position, distance and orientation of the marker via their smartphone and without the need for headphones.
- The goal is to help individuals with visual impairments find their way through stations by giving them directions along the way.
- The NaviLens interface has been specially designed for people with visual impairments.
For people with visual impairments
Download the free NaviLens app
![]()
![]()
![]()
For people without visual impairments
Download the free NaviLens Go app
![]()
![]()
![]()
and start getting help finding your way.
This project is being carried out in partnership with our architecture and signage experts. Both the architectural integrity and existing visual cues will be respected in accordance with our established standards.
The differences between the two stations allow us to conduct testing in different environments. With its single entrance, Mont-Royal station offers a simple path, while Bonaventure station presents a different set of challenges with its multiple entrances and busy surroundings.
Purchasing and validating a transit fare
Fare vending machines: Buy all types of fares and reload your OPUS card. Cash, debit card and credit card payments are accepted.
Reloading terminals: To reload your OPUS cards with all types of fares. These machines are wheelchair accessible but do not accept cash payments.
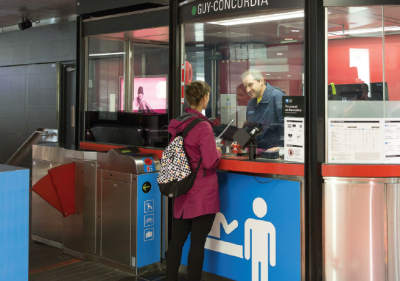
Station agents and Espace client: Buy all types of fares and reload your OPUS card. Payment terminals are accessible and accept debit cards and credit cards.
Travel companions:If you do not use paratransit services but have a mental or visual impairment, you are eligible for a companion card.
Validating fares
There are two ways to enter: the turnstiles and the fare gates. Only the red gates are accessible for wheelchair users.
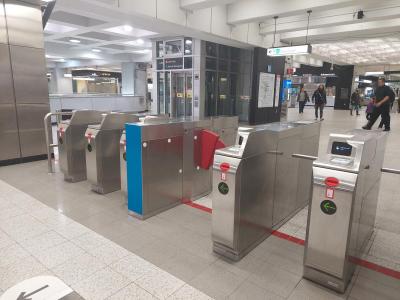
Keep your fare handy as it is your proof of payment.
Lexicon of terminology:
Fare gate: Types of fare gate include tripod gates, also called turnstiles, and wing gates, which open to the sides and are generally wider. Fare gates are where customers validate their fares to get into the métro.
Validation interface: The validation interface includes all the equipment at the fare gate that validates transit fares and lets customers enter the métro. When a valid transit fare is accepted, the wing gate opens automatically or the tripod gate is allowed to rotate when pushed.
Transit fare: Transit fares are tickets or passes that show that a customer has paid to use public transit. There are several devices that can be loaded with a transit fare: reloadable OPUS cards, non-refillable smart cards and magnetic fare cards. Transit fares can be purchased in advance from authorized retailers, fare vending machines or station agents at métro station fare booths.
OPUS card: OPUS cards are reloadable and can hold multiple different transit fares. They are plastic smart cards the size of credit cards but without any embossed text on their surfaces.
Non-refillable smart card: Some transit fares are available on these non-reloadable glossy paper cards. These cards do not have an identifying notch on their edge. They can be distinguished from OPUS cards because they are made of paper rather than plastic.
Magnetic fare card: Some transit fares are available on non-reloadable magnetic strip cards. These rectangular cards can be identified by a small notch on their edge near one of the corners.
Project overview:
Parts of the fare validation equipment (turnstiles and wing gates) at métro entrances are being replaced with a better-performing model. Smart cards (OPUS and non-refillable smart cards) and magnetic strip cards will still be accepted. Later, the new equipment will also allow us to upgrade to new technologies.
Upgrading the physical components of the fare gate interface will improve accessibility. The smart card tap target will be lowered and a touch screen will be added that will allow customers to use the same software interface used on the new bus card readers, including the audio function.
The new system will improve on existing fare validation features. Changes will only be made to the upper and front casing of the gates in the non-controlled area of the station, that is, the parts used to validate transit fares.
Physical description of the fare gate validation equipment:
The physical components of the interface will be arranged the same way for both types of fare gate. The new equipment consists of a tap target for smart cards, a touch screen and a magnetic card reader.
When you face the fare gate from the non-controlled area of the station, the transit fare validation equipment is located to your right.
Smart card tap target:
- The tap target is located to your right, slightly higher than counter height. It is in the centre of the flat horizontal surface. It can be located by touch. The target looks like a white square, 120 millimetres (5 inches) long by 120 millimetres (5 inches) wide and 8 millimetres (1/3 inch) thick. Your card will be read if it is tapped on any part of the target. The target is contactless-enabled, so you do not have to touch your card to it. This means that if you hold your card too close to the target, it could be read and a fare could be deducted unintentionally. If this happens, you will not be able to use that fare again.
- Keep your fare card on you for the entire duration of your trip. It is your proof of payment.
Touch screen:
- To find the touch screen, start at the tap target and feel forward along the left edge of the horizontal surface. You will hit a vertical surface. The touch screen is centred on that vertical surface, about 25 millimetres (1 inch) up from the horizontal surface. The screen is about the size of a smartphone in landscape orientation, and its frame can be located by touch. The frame is flat, rectangular with rounded corners, about 3 millimetres (1/8 inch) thick and 10 millimetres (1/2 inch) wide. You can use the screen to access the audio function. See the audio function section for instructions on how to it.
Magnetic card reader:
- Starting at the tap target, feel back toward yourself along the horizontal surface. The surface curves to a vertical surface. The magnetic card reader is centred on that curved surface. The card reader is red and the same shape as it was before.
- Magnetic cards must be inserted correctly. Hold your card horizontally with the notch on your right, inserting the end closest to the notch. If the card is not facing the correct direction, it will be ejected and you can reinsert it.
- The way this card reader works has changed. After being inserted, the card will come back out of the same slot. Your fare validation will be confirmed once you remove the magnetic card from the reader.
- Keep your fare card on you for the entire duration of your trip. It is your proof of payment.
Using the interface:
The software components of the interface work the same way for both types of fare gate.
Once a fare card has been read, the acceptance status is displayed on the screen and a beep is played. If the fare is accepted, you are authorized to enter, and the wing gate will open or the tripod gate will turn when pushed.
The beep will be different depending on whether the transit fare is accepted or not. A short beep means that your fare has been validated, while a long beep means it has been rejected. For photo OPUS cards, the short beep will play twice in a row when the fare is accepted.
The message displayed on the screen can be read aloud using the audio function. You do not need to hear this message, as the beep already confirms whether the fare has been accepted or rejected. However, hearing the message may provide additional information, such as the number of fares remaining on your OPUS card, if you are using individual fares.
Audio function description:
- After the beep plays, you have a few seconds to access the audio function and hear the message displayed on the screen. Caution: if the card reader detects a new fare validation before those few seconds are up, the new fare validation message will be played.
- To hear the message displayed on screen, you have to press on the touch screen. The touch screen frame can be located by touch. The spot you need to press to activate the audio function is located in the lower left-hand corner of the touch screen. You will hear the message displayed on screen, for example, the acceptance status of your transit fare.
What to do if there is a malfunction or a free-entry day:
If you do not hear a beep, this means that no transit fare was deducted from your chip or magnetic strip card. This may happen because the STM is having a free-entry day or because there is a malfunction in the fare validation system.
If you do not hear a beep, and the wings stay closed or the turnstile does not turn, there is a malfunction. Please use another fare gate.
If you do not hear a beep, but the wings do open or the turnstile does turn, the STM is having a free-entry day.
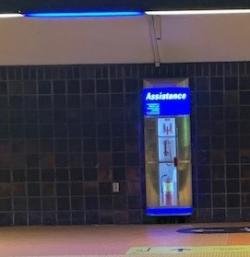
Assistance
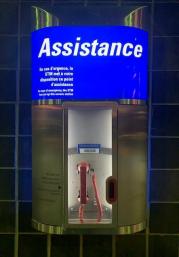
Black phones near the booth: Speak to a station agent.

Audio announcements in the station: The entire network is equipped with speakers that share audio announcements to customers and staff.
Station agents and inspectors can help you in the event of a problem.
Ask for assistance from a station agent (MR-73 removable ramp):
You can be accompanied by an STM employee to help you move from one station to another.
On your own, it can be difficult to cross the gap between the platform and the métro car. An attendant will help you to :
- Take the elevator to the first metro car;
- Get on and off the car by deploying the removable ramp (MR-73);
- Take the elevator to the ticket office at the arrival station.
Proceed to the ticketing level and ask the station agent for an escort. The station agent will make the request immediately. Waiting time may vary depending on how long it takes the attendant to get to you.
Services provided at Espace client booths:
- Buy a fare with a debit/credit card or contactless payment (paypass).
- Get a form to apply for a reduced fare OPUS card.
- Register your OPUS card.
- Have a purchase error corrected.
- Replace an expired or defective OPUS card.
- Recover the fares on a lost, stolen or damaged registered OPUS card.
- Obtain a refund.
- Open during métro hours, 7 days a week.
If an emergency situation happens, find the Assistance panel on the train platform and pick up the red telephone to speak with a métro employee. If you or someone in the station requires immediate assistance, our employee will quickly get in touch with first responders. You can also speak directly with any station employee.
If you are on the train and you or someone near you needs assistance, use the intercom to speak with the metro operator up front. He/she can then take immediate action to get more help or intervene directly to help out the person in need.
If the emergency brake is used as your initial reaction, the train will remain stopped if it has not already pulled out of the station. If it is already running, the train will stop at the next station. The operator will then have to walk to the car where the brake lever was pulled to assess the situation before contacting the métro’s control centre and initiate appropriate action if needed. Keep in mind that using the intercom can save valuable time!
STM staff will retrieve mobility aids and return them to owners following an incident, if necessary.
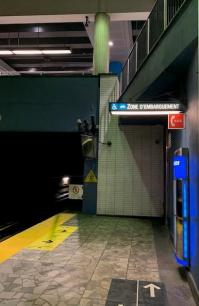
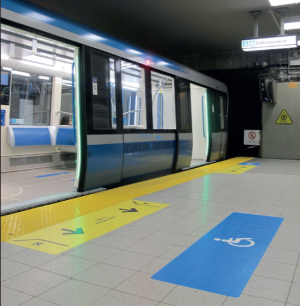
Waiting on the platform and boarding/exiting the métro
Before boarding and on the platform
Boarding the métro car
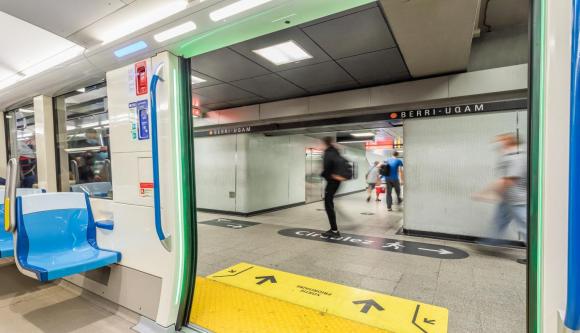
Boarding the first métro car
- Head to the first metro car to be visible to the operator.
- Position yourself with your back to the wall and engage your brakes. Avoid moving while the métro is moving.
- Fasten your wheelchair seat belt if you have one.
- When the metro is in motion, the manual wheelchair brakes must be activated. Motorized wheelchair must be switched off. Maintain its functions when the bus is in motion.
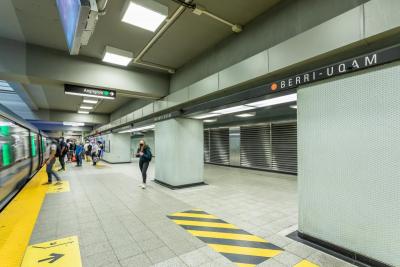
Exiting the métro car
Find the name of the station on the walls and pay attention to the audio instructions.
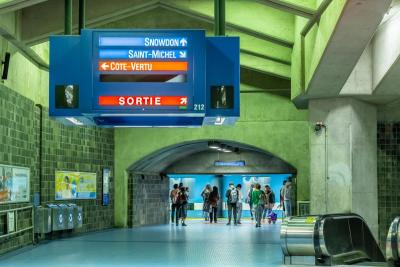
Leaving the station
Follow the signage to find transfers or exit the station.


Transfers
Transfers:All transit fares allow you to transfer between bus lines and the métro without having to pay a second time.
- Keep your validated fare during the entire trip, as inspectors may ask to check it.
- Validated fares are good for two hours.
- You cannot make round-trips or resume your trips once you have left the bus or métro station, even when returning to the same bus or métro route.
In the event of a service disruption
The safety of all our passengers is a priority. In the event of a service disruption or evacuation, our teams follow specific procedures to ensure assistance for passengers using wheelchairs. In some cases, paratransit services may be available to continue your journey.
Please refer to the FAQ below for guidance on what to do during a service disruption.
I use a wheelchair.
If your métro train stops in a tunnel, always stay in the first car.
If evacuation is not required, stay on board and wait for service to resume.
If evacuation is necessary, the operator will take the necessary steps to deploy a team to assist you as quickly as possible.
If the station is accessible
You may stay in the station until service resumes. Platform screens and announcements will keep you informed of updates and the estimated time of service resumption. The “Metro service status” section on our website also provides real-time information.
If you wish to leave the station, use the elevators. A sticker next to the elevators indicates the next accessible stations. A QR code also takes you to our “Elevator access to the métro” webpage.
If you need paratransit to continue your trip, use the assistance phones on the platforms or inform an STM employee on site. They will be able to help you.
If the elevators are out of service, refer to the next section.
If the station is not accessible, or you are at a station that is normally accessible but the elevator is out of service
You may stay in the station until service resumes. Platform screens and announcements will keep you informed of updates and the estimated time of service resumption. The “Metro service status” section on our website also provides real-time information.
If you wish to leave the station before service resumes, use the assistance phones on the platforms or inform an STM employee on site. They will be able to help you. Emergency services will be called to organize your evacuation. Response time may vary depending on the situation.
If the station is accessible
Use the station elevators to exit. If you need paratransit to continue your trip, notify a STM employee on site or using the assistance phones on the platforms.
If the elevators are out of service, refer to the next section.
If the station is not accessible, or you are at a station that is normally accessible but the elevator is out of service
Use the assistance phones on the docks or inform an employee that you need assistance to leave the station. Emergency services will be informed and will manage your evacuation as quickly as possible.